Module Generator
The Module Generator Command, will create all the "boilerplate code" needed for a new Module in your application. It's meant to be used as a starting point for your new Module, so you can focus on the business logic of your application.
For example if you want to create a new Module called Customer, you can run the following command:
php artisan modular:make-module CustomerThe Module Generator will create the following files:
./modules/Customer
├── CustomerServiceProvider.php
├── Http
│   ├── Controllers
│   │   └── CustomerController.php
│   └── Requests
│       └── CustomerValidate.php
├── Models
│   └── Customer.php
└── routes
    └── app.php

./resources/js/Pages/Customer
├── CustomerForm.vue
└── CustomerIndex.vue
Also a migration will be created for the Customer module, at database/migrations/create_customers_table.php.
Reviewing the Module's Generated Code
After the Module is created, you'll need to review the generated code and make the necessary changes, so it will fit your needs. A good starting point, can be:
- Check the
database/migrations/create_customers_table.phpfile, created for the Module, and update this migration with the fields you want to have in your table. - Check the
CustomerController.phpgenerated file, and add the business logic for the Module. - Map the
modules/Customer/Http/Requests/CustomerValidate.phpfile to match the fields in your Module's migration/database table. - Check the
resources/js/Pages/Customer/CustomerIndex.vuefile, it has a working Custom Vue Data Table Component and you can customize it to show the collums as needed in your page. It will come with a working search and pagination for you. - Check the
resources/js/Pages/Customer/CustomerForm.vuefile, and updated it with the fields of your Module's migration/database table, so the form will handle and post the data to the insert and update endpoints as needed.
You have full control over the generated code, and you can focus on the business logic of your application. Lots of common tasks are already handled for you, like:
- Clean and fast routing system patterns, integrated with Inertia.js
- Easy conventions to use the same form to create and update actions
- Validation errors from backend are automatically handled and displayed in your forms with minimum code
- Easy patterns to handle item search on your Data Table Component
- Easy patterns for pagination integrated with a robust Data Table Component
- Easy and clean patterns to show Toast/Flash Messages on the application interface (like "Customer created", etc)
- Easy and clean patterns to show a confirmation dialog before deleting a resource
- Fast builds with Vite
- Built in interface translation system
- Built in theme system
Configure the Migration
Open the module's migration file at database/migrations/create_customers_table.php and add the fields you want to have in the table:
<?php

use Illuminate\Database\Migrations\Migration;
use Illuminate\Database\Schema\Blueprint;
use Illuminate\Support\Facades\Schema;

return new class extends Migration
{
    /**
     * Run the migrations.
     */
    public function up(): void
    {
        Schema::create('customers', function (Blueprint $table) {
            $table->id();
            $table->string('name');
            $table->timestamps();
            $table->softDeletes();
        });
    }

    /**
     * Reverse the migrations.
     */
    public function down(): void
    {
        Schema::dropIfExists('customers');
    }
};
Run the migration to create the module's table:
php artisan migrateIn cases where your Module does not need a database table (if it will make and API request to hydrate the Vue Page component's for example), you can securely remove the migration file and skip the instructions above.
Registering the Module
After the Module is created, you need to register the Module's Service Provider in the providers array returned by the bootstrap/providers.php file:
<?php

return [
    App\Providers\AppServiceProvider::class,

    Modules\Support\SupportServiceProvider::class,
    Modules\AdminAuth\AdminAuthServiceProvider::class,
    Modules\User\UserServiceProvider::class,
    Modules\Dashboard\DashboardServiceProvider::class,
    Modules\Acl\AclServiceProvider::class,

    // Add the Module's Service Provider here...
    Modules\Customer\CustomerServiceProvider::class,
];
Building the Frontend
At this point you can review the generated code for the Module's Controller, Model, routes, etc. If you followed the example above, you can build the frontend so the new Pages/Customer components are available for the application.
To build the frontend, run the following command:
npm run devListing the Resources
Accessing the route /customer in your application, you should see this page:
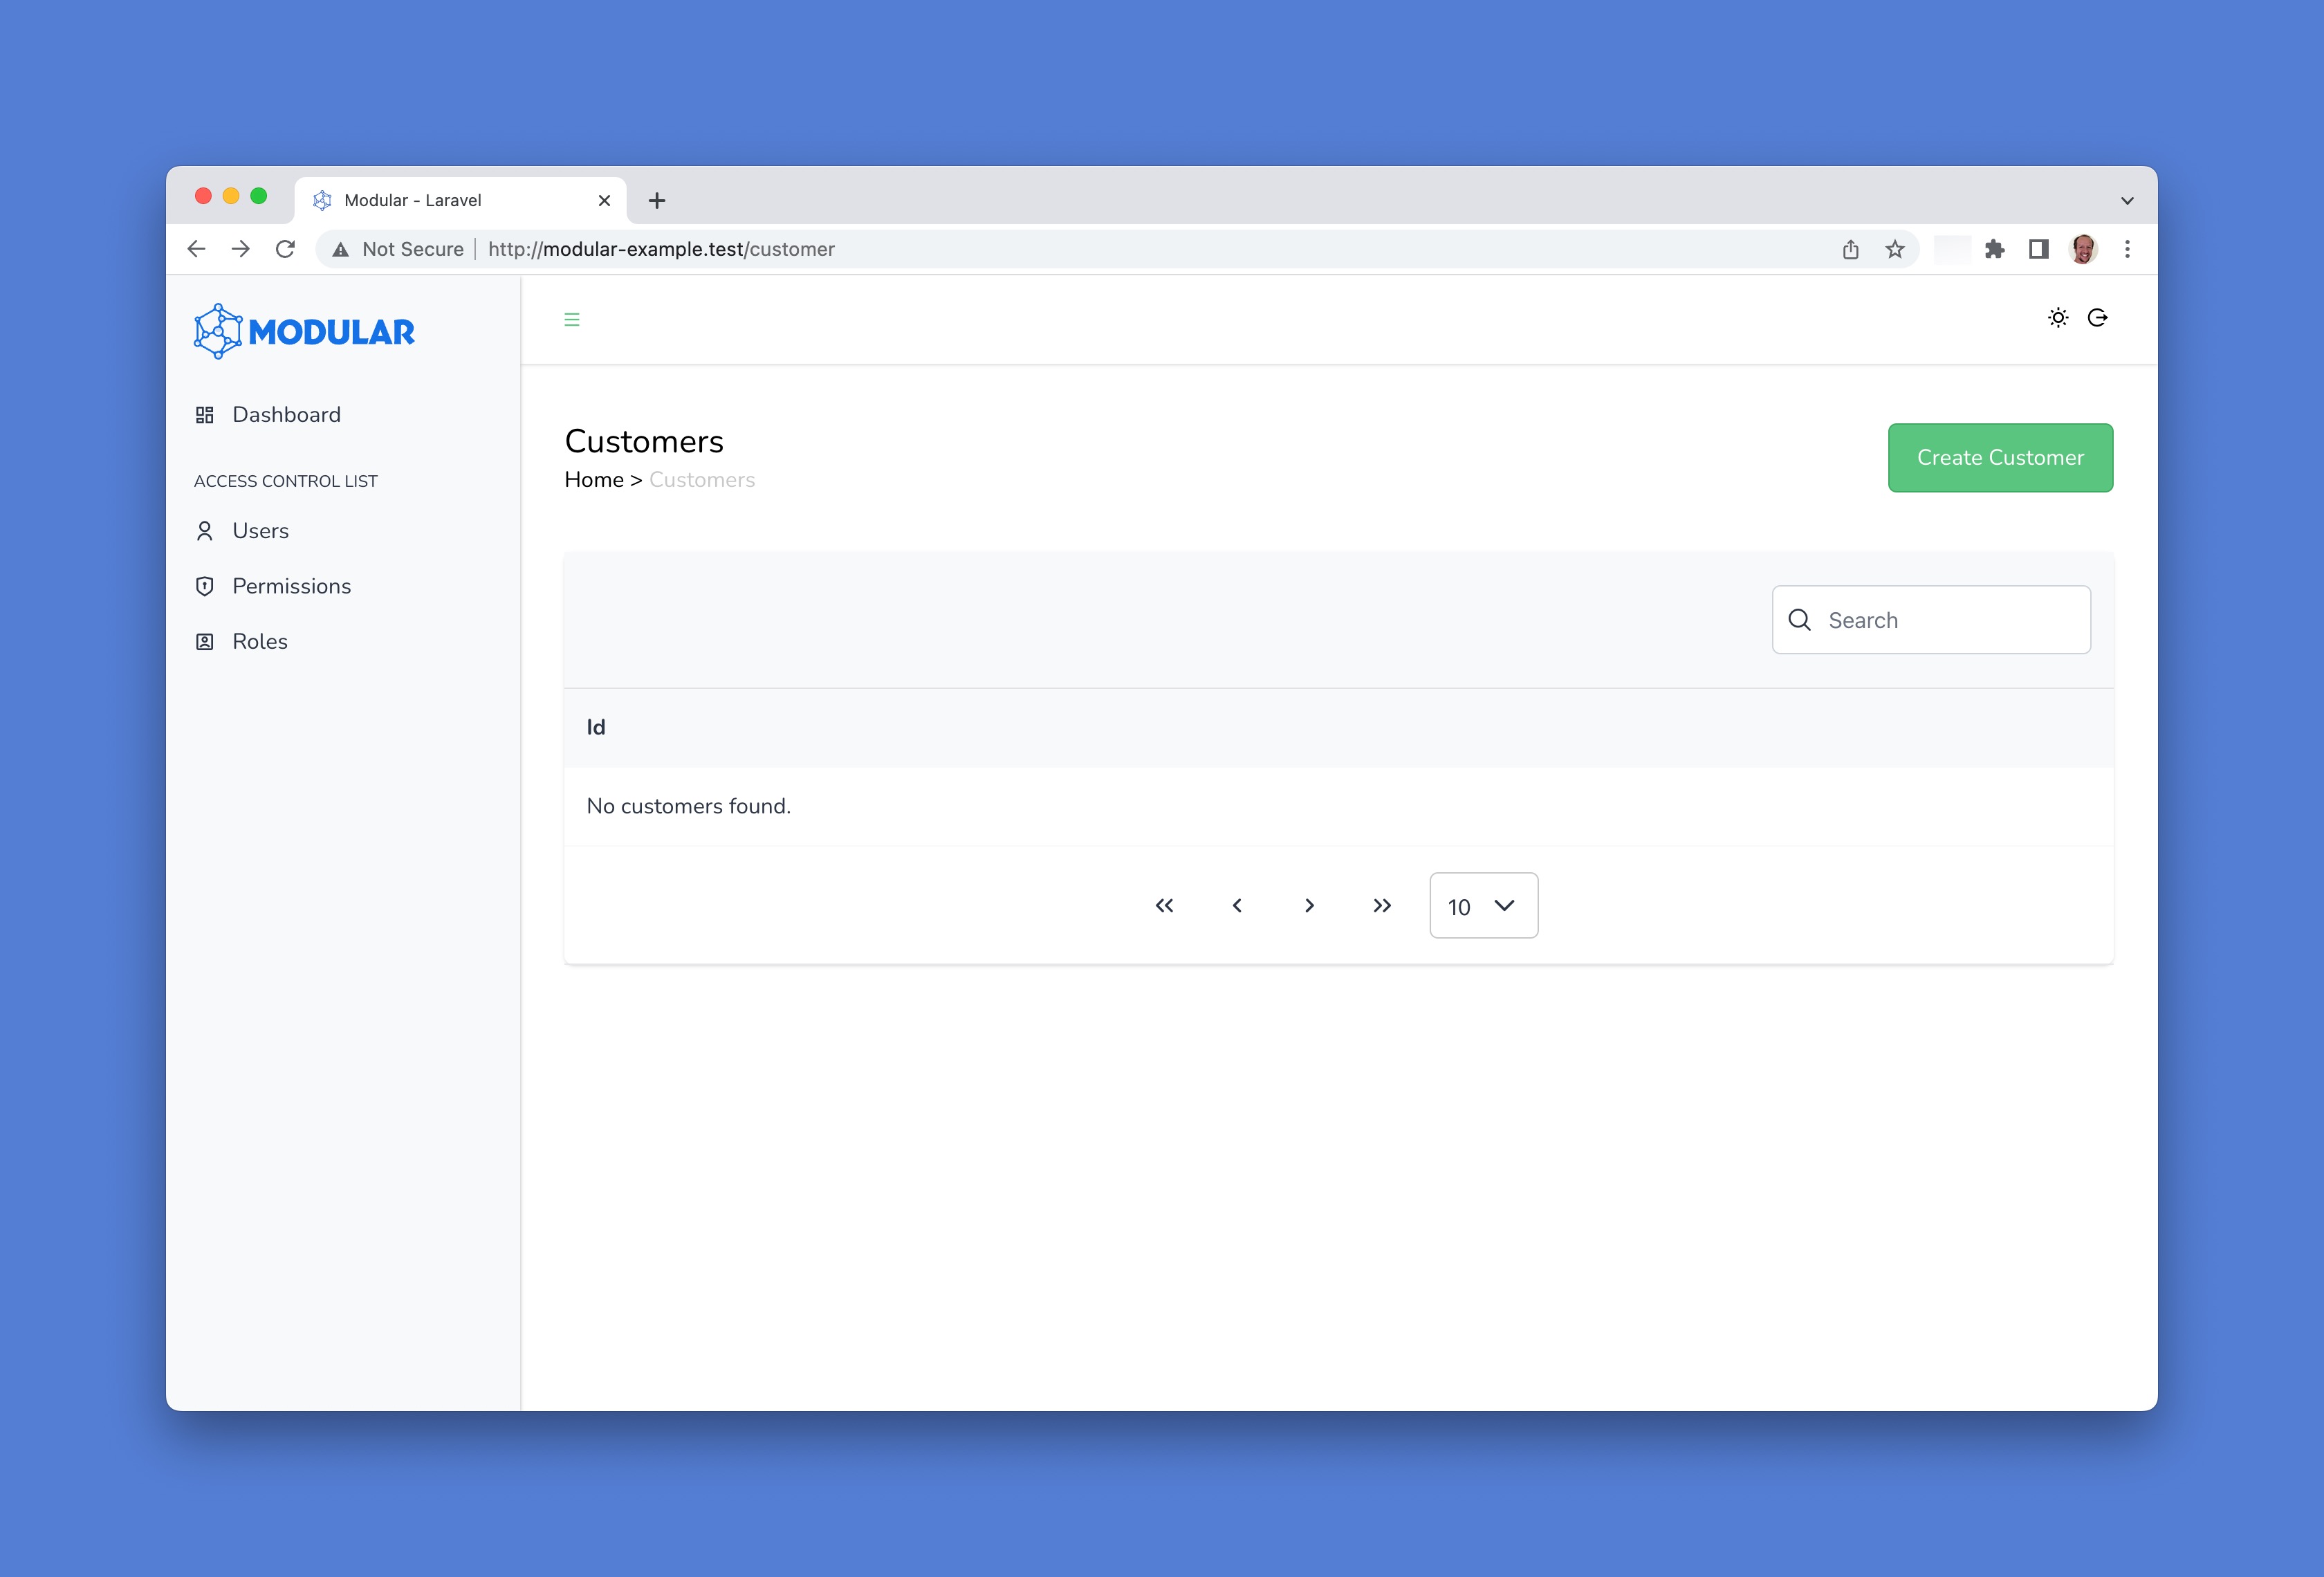
Note that the empty Data Grid mounted has a built in integrated search engine and pagination features. It also has the navigation buttons to create a new resource, and after resource creation, the edit and delete buttons are available for each resource listed in the Data Grid.